Getting started with Webpack.
![]() A short introduction on webpack Javascript module bundler.
A short introduction on webpack Javascript module bundler.
Prerequisites
We require Node pre-installed on your machines before we dive into the project. Webpack is a Javascript tool, so you should know Javascript.
What is Webpack?
Webpack is a Javascript module bundler.
What's a module bundler ?
Module is an independent, reusable, manageable unit of code that can be used multiple times in the same project or in a different project. Modules are written in separate files. Bundling is combining multiple files into a single file. So module bundler is a programme that takes the required modules and bundle them in a single file. Now we can add a single script tag reference to this file into your HTML page and Webpack will help browser resolve calls to all required modules.
Let's look at an example of modules.
addition.js
module.exports = function(a, b) {
  return a + b;
};
subtraction.js
module.exports = function(a, b) {
  return a - b;
};
multiplication.js
module.exports = function(a, b) {
  return a * b;
};
division.js
module.exports = function(a, b) {
  return a / b;
};
bundle.js
let add      = require(./addition);
let divide   = require(./division);
let subtract = require(./subtraction);
let multiply = require(./multiplication);

let sum        = add(3,4);         // sum = 7
let quotient   = divide(10,5);     // quotient = 2
let difference = subtract(6,3);    // difference = 3
let product    = multiply(6,7);    // product = 42
We have four modules here, addition.js, subtraction.js, multiplication.js, division.js that each export a function that performs an arithmetic operation on two numbers.
We want to use these modules, so we require all four modules in bundle.js. Since we are exporting functions, we can save the reference in variables and use them. bundle.js is added to the script tag in the HTML page.
But wait! That's not all webpack does. Webpack can help you manage static assets like CSS, fonts, images for the front-end. You want to minimize your static assets, compile Saas, gzip your files, want source-maps, webpack has you covered. There are a large number of loaders and plugins available for webpack that perform a lot of tasks beyond just bundling.
Webpack can be used with other tools like npm scripts, Grunt, Gulp to solve problems it doesn't.
Getting started
Create a directory and name it whatever you like. I have named it learn-webpack. Run npm init with -y flag or simply press enter for all prompts. Create two directories src and dist. Within src create a javascript file and a CSS file : main.js & style.css. In dist folder create index.html file.
$ mkdir learn-webpack && cd learn-webpack

$ npm init -y

$ mkdir src dist

$ cd src

$ touch main.js style.css

$ cd ../dist

$ touch index.html
Note: $ sign is command-prompt, and is only used for representation.
Fill up the three files with the following content.
Open index.html and put the following code in it
<html>
  <head>
    <title>Introduction to Webpack</title>
    <link href="../src/style.css" rel="stylesheet" />
  </head>
  <body>
    <h1>Hello Webpack</h1>
    <script src="../src/main.js"></script>
  </body>
</html>
in style.css
body {
  background-color: turquoise;
}
and main.js
console.log("Hello Console.");The directory structure should be like so:
learn-webpack
|
|- /node_modules
|- package.json
|- package-lock.json
|- /src
|- main.js
|- style.css
|- /dist
|- index.html
Open learn-webpack in any browser and check if it's working.

We see our CSS and javascript are working. Open devtools > console to view console.log statement from javascript file.
Installing Webpack.
Use the following command to install Webpack locally.
npm install --save-dev webpackSetup webpack configuration file - webpack.config.js
Now that we have setup our project let's write webpack configuration file. webpack.config.js is where you tell webpack what to do.
Create webpack.config.js file at the root of your directory.
touch webpack.config.jsFill it with following code.
const path = require("path");

module.exports = {
  entry: "./src/main.js",
  output: {
    filename: "bundle.js",
    path: path.resolve(__dirname, "dist")
  }
};
Let's go through it line by line.
const path = require('path'); :
We use the Node.js built-in path module to resolve relative paths.
module.exports = { }; :
We export an object using Node.js module syntax.
entry :
Specify the entry point for webpack. It can be a single file or an array of files.
output: { } :
The object specifying where to output bundles and assets.
{ filename: 'bundle.js', path: path.resolve(__dirname, 'dist')} :
Properties of output object. Webpack will spit out bundle.js in the output folder dist.
Let's Run it
In order to run webpack type the following code in command-line :
./node_modules/.bin/webpack./node_modules/.bin/webpack is where the Webpack binary is located. This command will tell webpack to search for webpack.config.js for configuration.
You can name the config file something other than webpack.config.js. In that case run the previous command with --config option and the name of your config file, like so:
./node_modules/.bin/webpack --config someothername.jsCheck dist folder for webpack generated bundle.js file. In index.html replace main.js with bundle.js and check if it's working.
If you open bundle.js you will see the Webpack bootstrap code. This code is what makes webpack work with your config. Scroll to the end to see our console.log('Hello console.') line from main.js.
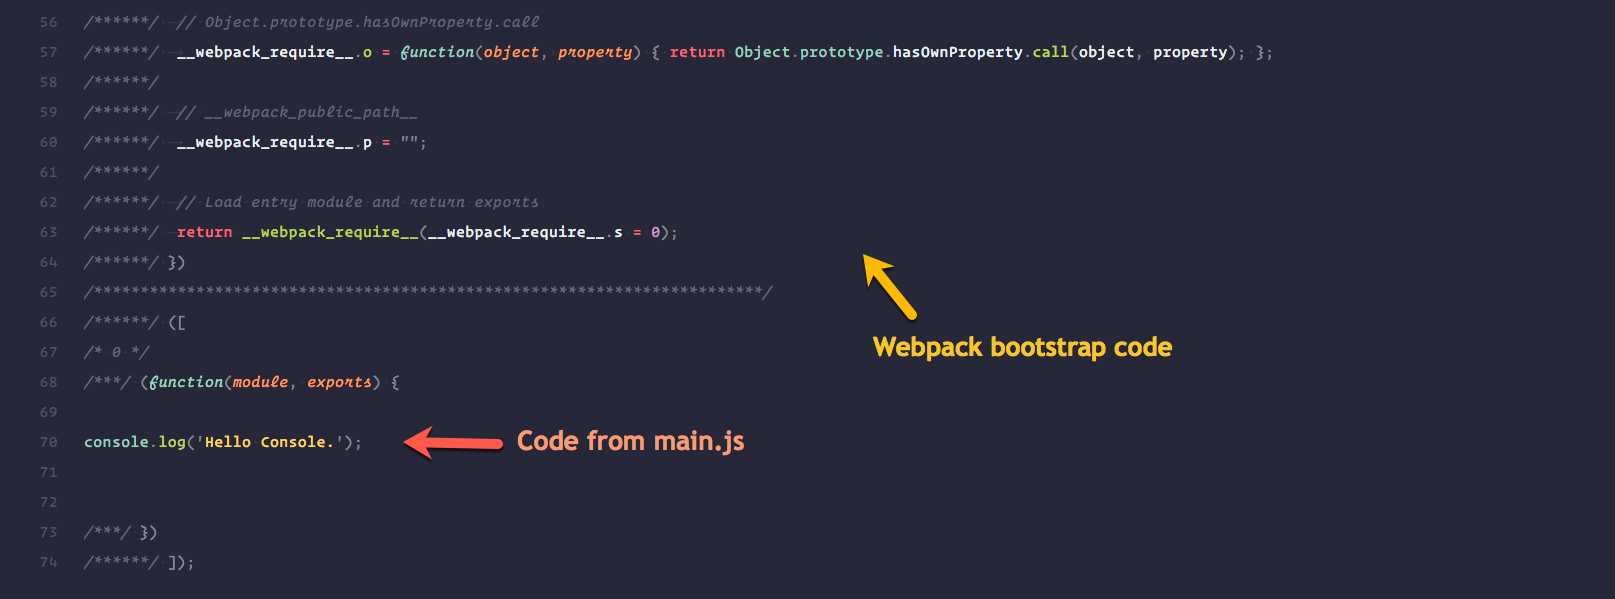 I have cropped the first 55 lines to keep image size small.😎
Loaders
Webpack works only with Javascript and it treats everything as a module. So how does webpack serve CSS, SCSS, images, fonts, etc? The answer is loaders.
Loaders allow you to convert the static files, as mentioned above, into something webpack can work with: Javascript modules. All your assets are considered modules that can be imported, modified and packed into your final bundle.
Let's use css-loader that will allow us to import CSS files directly from your JavaScript modules.
Install css-loader and style-loader.
npm install --save-dev css-loader style-loaderIn webpack.config.js add the following lines:
const path = require("path");

module.exports = {
  entry: "./src/main.js",
  output: {
    filename: "bundle.js",
    path: path.resolve(__dirname, "dist")
  },
  /* Add the following lines to use css-loader and style-loader */
  module: {
    rules: [
      {
        test: /\.css$/,
        use: ["style-loader", "css-loader"]
      }
    ]
  }
};
module: {} :
This option determines how the different types of modules within a project will be treated.
rules: [{},..] :
Rules can modify how the module is created. They test for a file and apply loaders.
{test: /\.css$/,use: [ 'style-loader', 'css-loader' ]} :
In the code above we test for any file with .css extension and apply style-loader and css-loader. The test file is specified using regular expression. The order of loaders matter as they are applied from right to left. Here css-loader is applied first then style-loader. css-loader will take the .css file and wrap it into Javascript module. The style-loader will injects CSS, that is exported by the JavaScript module, into a <style> tag.
Finally, add import './style.css'; in main.js to make it work.
Change the background-color in style.css and run ./node_modules/.bin/webpack. Check if the CSS is working.
There is ts-loader for converting typescript to javascript, babel-loader to transpiles ES6 to ES5 using Babel, sass-loader to compile SASS/SCSS, and many more.
Plugins
Plugins extend loaders functionality. We use plugins for anything a loader cannot do. Here is a list of plugins at the Webpack website.
We will install UglifyjsWebpackPlugin to demonstrate the use of plugins.
npm i -D uglifyjs-webpack-pluginIn webpack.config.js :
/* Require the installed plugin */
const UglifyJSPlugin = require("uglifyjs-webpack-plugin");
const path = require("path");

module.exports = {
  entry: "./src/main.js",
  output: {
    filename: "bundle.js",
    path: path.resolve(__dirname, "dist")
  },
  module: {
    rules: [
      {
        test: /\.css$/,
        use: ["style-loader", "css-loader"]
      }
    ]
  },
  /* Add the following lines to use UglifyJSPlugin */
  plugins: [new UglifyJSPlugin()]
};
We define plugin in the plugins array. Any options for plugins can be set within the parenthesis.
Run webpack and open bundle.js. We can see bundle.js is uglified as shown :
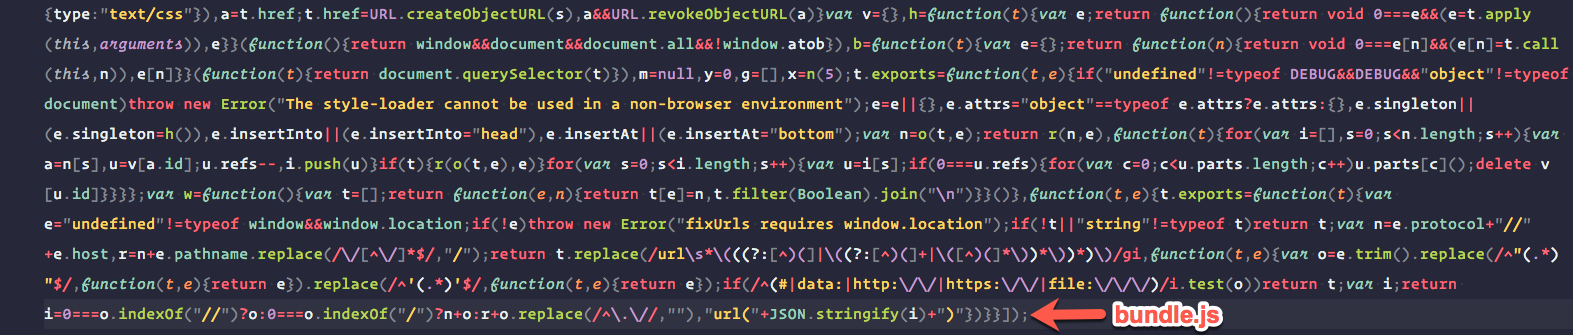
Webpack provides a list of plugins here, and some third-party plugins can be found here. Simply choose and use.
Conclusion
Webpack may not solve all your problems but does provide a solution for a lot of problems. For the things that it cannot accomplish you can use it with some other tools like Gulp, Grunt, npm scripts, etc. Head over to webpack.org for fantastic documentation and experiment with the different configuration.
Related Resources
Webpack is powering tens of thousands of websites and applications with millions of downloads every month. With large ecosystem and many contributors, it's still growing. The following links will help you learn more about Webpack.
- Webpack Academy → Execellent video course by Sean Larkin, who's part of Webpack core team.
- Webpack for Everyone → Another great video course, by Jeffery Way.
- Webpack Documentation → Pretty much everything you'll need.
- awesome-webpack → A curated list of awesome Webpack resources, libraries and tools